


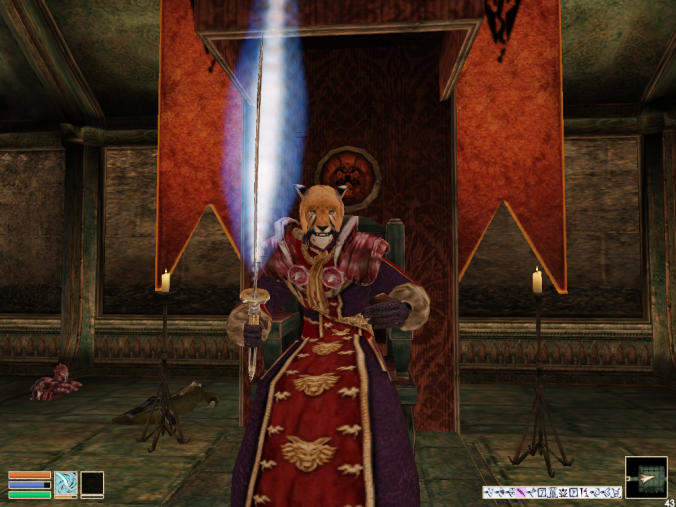
Morrowind - The Adventures of Cat Dude
![]()
Tribunal was not installed as of this writing - I don't know how well it will work on other versions, or with the expansions installed.
Subsections Cat-Dude's Photo Album - A collection of weird and wonderful screenshots
Extra - Stuff about Tribunal, Bloodmoon and brewing Ultrabong.
Videos - Various videos of Morrowind bugging out.
In the beginning
Create a Khajiit, preferably with the male cheetah face and long, blonde hair. I called mine 'Cat Dude'. You might call yours 'Kitty'. 'Lord Nerevar' is a good one, too, although the DMFA standby of 'Daniel Ti'Fiona' has never been more appropriate. Ever.
Use the following specs:
Custom class: 'Classified'
Major skills: Longsword, Destruction, Restoration, Acrobatics, Athletics
Minor skills: Armourer, Sneaksie, Marksman, Illusion, Enchant
Make his sign The Ritual, because it gives you Mara's Gift, which is dead handy for not dying, especially when you're low-powered.

Cat Dude went around killing humans with what I believe he described as a 'F___-off big hammer'.
Kitty hits the road
I did this for System Shock, but let's do it again. The hero is an incubus from Amber William's DMFA webcomic.I mean, seriously... you've got a sword-wielding cat-bloke in a robe who does not need to eat or sleep since he feeds on emotions, can live for 3000+ years, steals souls and is highly adept at magic.
The only thing that's missing is the ability to mind-read. Even the lack of wings would be because 'Cubi are shapeshifters who tend to disguise themselves as ordinary mortal Beings.

Daniel Ti'Fiona, or Lord Nerevar as he prefers to call himself
Anyway. You'll start at Seyda Neen, a rotten hole of a place, which we should soon be leaving - for good, hopefully. Take the ring in the barrel and the bottle.
Before you do, head NW until some loony old mage tries to fall on your head. Whenever you travel, do so by running and jumping. It's cute to watch him pounce, and it builds up your acrobatic and athletic powers really quickly.
Strip the mage bare and dispose of the corpse. It is never explained how Cat Dude always manages to hide the body so completely, regardless of where he is, although the fact that he is a large carnivore who never seems to eat may have some bearing on this. Wield the lightning sword and don the robe - it looks kind of cool.
Go back to Seyda Neen and sell the bottle, and all your old clothes. Cat-Dude walks digitigrade and can't wear shoes, so sell both pairs (why did Cat Dude even bring shoes with him to Morrowind? Some sentimental attachment?) and the dagger from the office. Keep the robe, sword and scrolls.
Roughly east of SN is a cave called 'Addamasartus'. Bounce your way there
and rest outside so you're completely fit. Then go inside.
Now, there is an interesting property of caves. Like the TARDIS, insides and
outsides are different dimensions. We can use this fact to our advantage.
You will be assailed by evil dudes positioned at various stages in the cave.
This does mean that we can attack them one by one, which is fortunate.
Attack with your sword. If you can kill them quickly and easily, either pocket
their belongings, or dump them on the floor. Left inside the corpse they are
likely to vanish, which we do not want as we can sell them.
Keep anything good, like lockpicks, probes, money etc.
Now, Cat Dude starts out weak as a kitten. This is embarrassing - Morrowind is probably the only environment where a healthy adult cheetah can lose in a straight fight with a rat.

DMFA strip 106
Our purpose in visiting the cave is to rectify this unfortunate position, since there are certain magical items which will turn the game around. If we find what we're looking for, brilliant - if not, it will help raise money and stats. In the meantime, we have to ensure Cat Dude's survival and this will not be easy.
The chances are that your foe will not go down quickly OR easily, in fact they'll more than likely take you down instead. Use the lightning sword as your main weapon for now, and lead your opponent to the inside door.
Strike them, and just as your health is running low, run back through the door to the outside world. Do not rest. Resting will heal you, but it will also heal your opponent. Instead, heal yourself up with Wotsisface's Healing Ring (we'll give it back later... perhaps...). This will likely not heal you to full strength but it will help. Keep going until the power runs out. Now it's time for a little creativity.
Walk back towards Seyda Neen, and as your approach the bridge, rest. It should tell you that resting is illegal and allow you to 'wait' instead. 'Wait' for about five hours. Do NOT rest if it gives you the option to do so - keep going until it allows you to 'wait'. This is crucial.
Five hours of hanging around should be enough to recharge the healing ring,
so use it again. About three cycles should be enough to get you back to full
health. The critical thing is that while you have healed yourself up,
matey back in the cave is still in exactly the same state as he was before.
Go back into the cave and finish him off. Use Mara's gift if need be.
Once he's dead, shunt all his goodies onto the floor (or your pockets) and
rest. Proper resting this time, to replensish your magic, health and all.
If you used Mara's Gift, make sure you rest 24 hours to restore it, and then
save before moving on to the next victim.

If even this isn't enough, a slightly cheaty way is to get them near the door so they're immediately in front of you as you enter, go back outside and save. Then you can go inside, swipe at them, and reload or run back outside and save again, depending on which of you came off worst.
Fire-bite is a good spell for killing Cliff-Racers. In caves, it also works well on Bosmers and to some extent Nords, but for Dark Elves and most other people, stick with the sword. When the sword runs out of power, you can use the illegal-to-rest-here trick to recharge it via solar power, but you can only replenish the Fire-Bite spell by actually properly resting.
Once you've killed sufficient numbers to reach the chests, search them. If you find Skooma or Moon-sugar, dump that on the floor so we can flog it later to some disreputable sod. There are other goodies we are particularly keen on but most of these won't start to appear until you're level 6.
Once everyone bad is dead, free the slaves.
Next, move on to Zainsipilu, which is NW of Seyda Neen. This one is harder as it's a longer trek to SN, but it should work.
This cave in particular has a room filled with crates. Try to lure the guard out of there and dispatch him elsewhere if possible, since the contents of such crates are only generated as you approach them and it will be better if you wait until you're level 2 before raiding them.
Collect potions. You can sell these for a considerable sum, which you should put into Longsword training, leaving about 400 free.
After that, I suggest you move on to Pelagiad. There are a couple of caves nearby but don't raid those yet. Instead, just bum around the areas of Pelagiad, Suran and Vivec, blowing up rats and other things with Fire-bite and slicing them up with your longsword. Remember to travel by bouncing - this little lot should bring you up to level six in fairly short order. Check out the boxes in town as well - you might find an attack ring of some description, although the exact contents are unfortunately randomised which is why this part of the walkthrough is kind of haphazard.

You might want to visit the cave of 'Ummagumma' or 'Ulummusa' or whatever it's
called, which is fairly straightforward and contains the silver bowl.
Giving that back to Beluelle will give you some good feedback in the town, which
is handy since trade in Morrowind is uncannily similar to ebay.
Another cave worth visiting is 'Adanumuran' which is fairly straightforward but
not brimming with crates that you would waste by raiding prematurely.
You may find that your sword starts to wear out. If so, repair it yourself, purchasing the hammers from Pelagiad. DIY is best since it can help you level up. To help cover the cost, go fishing for pearls in the lakes nearby. This is generally a good idea since there are often fish you can cut up, which again makes the process of reaching level 6 faster.
Finally, there is an abandoned ebony mine called 'Vassir-Didanat' which is almost directly north of Hassour. If you can evade the Flame Atronachs and load up on Ebony, you can kit yourself out with a bunch of steel armour when you flog the stuff back in Pelagiad. Killing the Flame Atronachs can be done by getting them stuck against the mine bracings since they are just a shade too tall. They only shoot about three flames each before running out of power - after that it should be a matter of running up to them, smacking them with the sword and then running back quickly. This is still very dangerous and you'll probably need to use the healing ring a lot.
"Bring him back when he's six."
When you're level six, return to Pelagiad and save. Visit the cave of 'Panat' which is just north of Pelagiad. Save in a different slot before taking this one on because you may need to do it several times over in order to get the specific result that we need.Save in differnt slots just before and after killing the Nord. You should hopefully be able to retake from this slot if things don't go to plan. If not you may have to do the entire cave again. Basically, when you get into the final chamber containing the mage, run around checking out all the crates and barrels. You are looking for the Ring of Toxic Cloud, which is one of the most kick-ass weapons of all time. If you get it, quicksave at once and worry about dealing with the mage later. Indeed, you don't really need to worry since giving him one dose of the ring will kill him dead in about 5 seconds. The ring is absolutely without equal for killing Dark Elves, and there are a lot of those who are in dire need of getting their heads smacked in as we shall see.
If the One Ring isn't there, reload back to after you killed the Nord. There does seem to be some logic in the program to detect that you're waiting for the right kind of shit to appear in the crates, so you might need to wind back several saves in order to get the result. I did manage it several times so it can be done.
If it really isn't going to plan and you don't mind being branded a cheating bastard, you can create one from the debug console using the following command: placeatpc "ring of toxic cloud" 1 1 1 ...but don't make a habit of that.
Now you have the Ring, use it to erase any surviving foes and then release the prisoners.

One Ring to kill them all
And in the darkness hide them
In Redmond where the shadows lie.
Next, visit the cave of 'Mannammu' This is within sight of Pelagiad, which means the illegal resting trick works with no additional effort. Now you have the ring of absolute power you'll be almost unstoppable so go inside.
When someone dies their relatives must carry out the sombre task of house-clearing and sorting through the deceased's possessions. We will soon have to do this ourselves. Granted, Dovres Verethi is currently still alive, but that is just a minor detail that we'll attend to in due course.
Once you've bumped off the first few opponents and made it to the first cache of goodies, tear it apart. Look out for soul gems and gem-feeder scrolls, which we will need later, but pay particular attention to any rings and amulets you find. Specifically we are looking for:
- Flame-bolt
- Thunderstrike
- Toxic Cloud - these take a lot of power so grab any others you find. Spares are a good thing to have.
- Firestorm ring
- Dwemer Tubes - if you find one, hang onto it. You'll want it later.
- Dwemer Coherer - as above. You might want this later.

One of Barrel-Head's late relatives
Cat Dude's Greatest Hits
Now it's time to deal with Ahnassi. You can find her in the Halfway Inn at Pelagiad. Befriend her, and she will call a hit on some evil bugger who lives in Gnaar Mok. Normally we'd do it anyway, because killing evil buggers is fun, but this particular evil bugger is a top guy in the Camora Tong who run most of the slave trading in Vvardenfell and that is something we cannot forgive.It is important to note the way the justice engine works in this game. He who strikes first is Guilty. If you attack an Ordinator for calling you scum, the game will find you Guilty. If you manage to piss him off, he will attack you first and the game then considers it perfectly just and proper for you to lop his head off.
So, head to Vivec, take a boat to Hla Oad, and from there to Gnaar Mok.
Find the hut, and talk to Daren about Ahnassi, twice. The first time he'll
threaten you. It's tempting to kill him now, but the price on your head will
make the journey back a bit fraught and you'll need to bribe the boatmen huge
amounts of money.
Instead, ask him again and then he'll attack you. Dab any one of them with
The Ring and with a flash of green light, all four of them will go 'uh!' and drop dead at once. This will
give the local cops a real headache.

Daren Adryn was the first. The list is long. Dirac Angestun Gesept
Make your way back to Ahnassi and she will give you some clothes and ask you to cure her ex-mate of his drug habit. This is easy - go to Jobasha's rare bookshop in Vivec, and buy him a copy of Naked Lunch by William S Burroughs. This will straighten him out real good.
As a reward, you become Ahnassi's new boyfriend and she will now let you
live with her which is sweet of her, and dead convenient for you.
To take full advantage of it, go to the temple at Balmoral and purchase the
spells of Mark and Recall. Mark Ahnassi's house - we will use it as our base
of operations.
Note that Pelagiad is on the border between Vivec and Balmora territories. If you cast AI from Ahnassi's house, you will generally end up in Vivec. If you stand just behind the Halfway Inn and cast it, you'll end up in Balmora.
The Soul Trade
Now it is time to reveal one of the lesser secrets of moneymaking in Morrowind. This is a good way to kickstart things but it only works from about level 6 since the necessary items will not appear until then.Discard any 'petty' soulgems, and try to concentrate on 'common' and 'lesser' ones. It's too early for 'grand' ones and 'greater' ones are likely to be rare but grab them if you can. Once you have a few, go hunting rats and steal their souls in true incubus fashion.

DMFA Strip 572
In particular we want diseased rats. For some unfathomable reason their souls fetch a tremendous sum on the black market, far more than healthy or blighted rats. One way to tell is to invoke the console (press '~') and hover the mouse over the rat - this will tell you at a distance if it's healthy, blighted or diseased. We only want diseased rats.
When you find one, dump all the gems on the ground except your best ones (the game automatically goes for the cheapest one), cast the Gem-Feeder scroll and blow the rat away. If it's a 'greater soulgem' it will be worth 2400 gold coins, 1600 for a common soulgem and 800 for a lesser gem which is not to be sniffed at. Grand soulgems will be worth 8000 which is actually counterproductive as you won't be able to sell them easily.
To convert your booty into gold, you will probably need to go to Creeper, a scamp merchant who lives in Gorhak Manor in Caldera. The Mage's Guild in Vivec is probably the best way to get there. He has 5000 gold coins per day and always pays full price unless the goods are damaged, which won't be the case with souls.
Make a few grand as a test, and then head to Vivec to seek your fortune.
Wizardry
In Vivec, go to the Foreign Quarter and visit the Mage Guild. Ask to join, and then go to Balmora. Take your orders from Ajira. When she sends you to get the bowl, things will go a little strange and she'll forget to ask you for the bowl afterwards. Don't remind her. Eventually she'll say 'come back when you're a Warlock', which I originally thought was the top rank.Take her suggestion of getting your next set of duties from Edwinna Elbert in Aldebaran.

If you have been using your sword as your primary weapon, you are likely to find that Destruction is your bottleneck. There is a trainer in the Caldera mage guild who teaches destruction, but if you exceed your Willpower level (I generally concentrated on Strength, Speed and Intelligence when levelling up) you could come unstuck. Either way, you'll probably want to spend a large amount of time in the wilderness outside the Caldera mine, blowing up rats and stealing their souls. Once you've exceeded the Caldera trainer in Destruction, there is a better trainer in Dirty Muriel's at Sadith Mora.
As for the quests - mostly involving Dwemer stuff - some of these can be neatly bypassed. If you managed to find a Dwemer Tube in your caving expeditions, you can give that to Edwinna immediately. Likewise, there is a Wizard's Staff in Rammilk, which is the Daedric ruin just SE of Fort Buckmoth in Ald-Ruhn. In any case, return periodically to Vivec. There are a couple of decent caves there, such as Nund, which you can plunder to your heart's content. There is also the ruins of Ald Sotha, which are kind of dangerous, but should allow you to get your paws on some serious goodies such as ebony swords, and maybe even some Daedric stuff.
Selling Daedrics is kind of awkward since they often go into the tens of thousands, but it can be done. East of the Dwemer ruins of Mzahneh, directly north of the Bal-Fell shrine, there is a small island containing a single, non-aggressive mudcrab. This is the famous Mudcrab Merchant, who has 10'000 gold coins of change per day. He only buys weapons and potions though, so you'll still need Creeper for soul-selling.

The Crab lives here
A borrower and a lender be
Anyway, I shall now reveal one of the great secrets of moneymaking. Most people figure this out anyway, but whatever.Say you've got a sword worth 20'000 gold coins that you want to sell. Even the Mudcrab can't afford that, but you can offer him finance. In effect you give him a loan to purchase the sword, which he pays back over the next few days.
Assuming a 20k sword as above, what you must do is this. Ensure that the mudcrab has at least 10'000 gold worth of weapons and armour in his inventory - buy some back from Creeper and sell them to the Mudcrab if need be. If it was a 40'000 gold coin sword, he'll need 30'000 of goods, so this gets more effective over time. Either way, make sure that he has sufficient goods and that he has a full purse. If not, sell a sufficient quantity of smaller goods and them rest 24 hours so that his purse is refilled.
Now sell him the sword. At the bottom of the screen it will give the total amount he owes you, which is currently more than he has. Keep buying junk goods from him until that amount goes down to 10'000 or less, and then close the deal.
Now you have 20k and about 10k worth of unwanted junk. Rest for 24 hours again and sell the junk back to him. What we're effectively doing is splitting the payment. Obviously this can get a bit tedious, but it does allow you to rack up millions of gold coins in relatively short order just through natural progression of the game.
Ebony spears are very useful, as they are worth 10k each, which makes them one of the most efficient ways of splitting the payment. Buying seven of those while selling an 80'000 Golden Saint soul and then selling the spears back over the week will make you 80k richer, but obviously it does mean that the crab has to have seven spears previously sold to him first.
Short of Staff
Once you're a Warlock, Ajira will send you off on Ahnassi-like friendship quests to retrieve cool stuff. Either that or she's trying to get you killed because she can smell Ahnassi and she's jealous.One of these is the Warlock's Staff. Once you have this, show it to Ajira and then leave it on Ahnassi's dining-room table. Owing to its obscene value selling it is basically impractical, but there is something cool about marching home with it.
Ahnassi: Evening, dearrr.  Did you have a goood day at worrrk?

Catdude: Why yes, dearrr!  I found a magical ball on a stick worrrth morre
         than Pelagiad and everrything in it combined and we'rrre rrrich beyond
         the drrreams of avarrrice!

Some stuff the cat brought in
Do what Edwinna asks. It's usually possible to batch missions together, for example
Mzuleft (the Dagon Fell ruins) and the Gnisis Mine mission can both be performed in
a single operation, returning to her with both items.
You will likely find that Destruction is a bottleneck. Given about 40k of cash
it is possible to generate a feedback loop with the trainer in Dirty Muriel's
whereby he teaches you lots of destruction, thus levelling you up so that you
can increase the skills needed to improve your destruction. If you hit the
upper limit of your current level, get him to teach you Illusion. All major
and minor skills contribute to levelling you up, but 'misc' skills don't.
Try to get more than 80 points of destruction - he tops out around 83, which
is enough to become Master Wizard.
Alpha Mage

We're off to see the Wizard...
When you become a Wizard, Trebonius starts to challenge you. Don't go for it yet or you'll wedge the guild - they end up having NO arch-mage at all since the only one in line for the 'throne' isn't qualified to replace him. None of the mages will respond to his name at all anymore but some of them will still refer to him in passing if you ask for duties.
Instead, become Master Wizard by doing duties for Skink in Sadith Mora, since Ranis Athrys, Balmora's guild steward is psychotic. When you reach Master Wizard level, ask her for duties and carry out the first two. Go to Punjabi and the other place to get the money and recruit. This will require about 200 gold coins in bribes to pull off.
When you get to the second mission, to stop He-Just-Stands-There from practicing Restoration, agree to do it and then head back to Vivec. It's time to become Archmage.
Find Trebonius. He should ask if you're trying to replace him. Agree to a duel
to the death, and head to the Arena. Go into the top floor, so that you're in
the audience balcony, and enter brandishing a lockpick as your weapon.
Now jump over the railings, down into the pit and bap Trebonius with the Ring
of Toxic Cloud. The entire battle should take approximately seven seconds.

Trebonius Artorius was the second. The list is long. Dirac Angestun Gesept
Put on his robes, the purple ones with the hole in the back, and wield his personal staff as you make your way back to the Mages Guild, who should greet you as their true lord and master. Any mention of Trebonius will be met with consolation from them.
Back in Balmoral, visit He-Just-Stands-There in the South Wall Corner Club and have a little chat with him. Tell him that you'll tell Ranis that he's stopped doing it, and do so. After all, you're Arch-Mage now so this is can be considered an official change in Guild policy.
Suran Suran
Go to Ahnassi's place for a little R&R. You might want to do her Flower Quest, and go to see her friend in Vivec. You can get her to train you to maximum in Acrobatics, and Sneak will be good too. Not because we need it so much as because it will level you up really quick. When you're done, make your way to Suran.Directly West of the Suran Slave Market - up the mountain - is a mad Orc who says he's immortal and wants to die. He has a set of expensive armour and a very, very nice sword, so I think it's a good deal. Find him, using either the Wizard's Staff (levitation) or a Jump spell, decline to kill him and save. Then agree, and blow him away with the One Ring. Run, because he is not an easy kill. You'll probably need two doses of The Ring, and he'll try hard to kill you, but if you've got good Acrobacy you should be able to jump out of the way a lot.
When he's dead, scoop up the armour and sell it to the Mudcrab Merchant. Take the sword as your own because it can do some serious killing.
By now it should be about 180 days since the game began.

Umbra was the third. The list is long. Dirac Angestun Gesept
Wipeout
Do you want to be rich? I do, and now we have the Ring, it's time to seek your fortune. Naturally the only place we can do this is Vivec, where the streets are paved with gold... or will be soon, at any rate, and not in quite the usual sense.Go to Vivec. Ask people about rumours and you'll hear about the murderer. Talk to the Watch Officers - you might need to bribe them - and ask about the rumours, the work and whatever. They should give you the clues.
Head to the Foreign Quarter and ask around. They should tell you about some psycho woman down in the sewers. Find her and kill her with the One Ring. While you're down here, find the secret orc temple and kill everyone involved. By taking the goodies from the Altar you should be able to summon a Daedra which you can then kill with the Ring, hopefully getting some kick-ass Daedric goodies to sell to the Mudcrab.
Now, return to the Watch and claim the reward. Choose the Cuirass and Helmet. Yes, the helmet won't fit on your cat head, but the belt was a useless crock - it was only worth 40 gold or something - and the Cuirass... ah, now the Cuirass will come in very, very useful.
And with that, it's now time to reveal the darkest inner secrets of moneymaking.
Money. That's what I want.
The Ordinators are a bunch of bastards, who never seem to be able to get out of the habit of calling you 'scum', even after you've saved the world.Wander around the outside until someone does call you this and then put on that lovely Cuirass and talk to them again. The Ordinator will go totally psycho and try to kill you, so blow him away with the Toxic Cloud ring.
When he's dead, strip him of his armour and take it to the Mudcrab Merchant. On the way you should encounter another Ordinator. Keeping the Cuirass on, talk to him too, and then kill him. If you can't carry both sets of armour, dump what you can't manage on the ground and return for it later.

A dismantled Ordinator
About now, the Ordinators should realise that something is very badly amiss. Whereas before you had to actually go up to the Ordinators and say "Look at me! I'm wearing armour from an Ordinator I've just murdered!" in order to upset them, after the first two or so, they will attack you immediately upon sight.
Things should now enter a fabulous state where the Ordinators declare you an outlaw on an effectively permanent basis, which makes the usually boring walk from the Temple to the Mages' Guild into a thrilling adventure.
Ignore this insofar as is possible and make your way to the Mudcrab. Remember, don't leave the armour in the body, or it will vanish! If you can't carry it, leave it in the road and come back for it later. Even if you slip up and get caught attacking one of the Ordinators, each one has a scrap value of just under thirty-three thousand gold coins which makes the fine of 40-1000 gold pieces insignificant.

DMFA strip 287
Back at the crab, sell everything EXCEPT the original Cuirass, which you can put on top of the wardrobe back home. You might want to keep the gloves too as they are kind of neat, being black and all. Note that the mace is worth more than 10k, so you'll have to use the 'spread payment' technique in order to sell it. Now return to Vivec and head back for more.

Thus are the streets of Vivec paved with gold
"Reach Heaven by violence, then."
When you have around 300k, go and find Azura. She will send you on a quest to a hut near Dagon Fell. There, you must kill a bunch of goons including a Golden Saint. Before you head off to do that, try to get hold of a Grand Soul Gem, so that you can de-soul the saint. We will need this soul later.When that's done, return to Azura and she will give you Azura's Star. Now go to the South Wall Cornerclub in Balmora and get Chirranirr to train you to 47% in security.
Now go to Lord Vivec's Palace. Break into it, kill him and steal his soul using Azura's Star. We will use his pain and torment to light our desklamp.
Vivec won't go down easy. Jump around dodging his death-spells until he is exhausted and can cast them no more. Then go up to him, bap him with the Ring and run away. You may find that it helps a lot to wear the Necromancer's Amulet from Trebonius. When you inevitably tire and he stands there punching and kicking your unconscious form, it will automatically heal you slightly faster than he is able to attack you.

Lord Vivec was the fourth. The list is long. Dirac Angestun Gesept
To Forge the Amulet (and other stories)
Once Lord Vivec is in your pocket, get hold of an Exquisite Amulet. Make sure you know a Fortify Strength spell of some description... the Imperial Cult usually sell these so ask around.When you're done, find an enchanter and get them to create the Amulet of Carrying Shit using the Amulet and Vivec's soul.
The Amulet of Carrying Shit
The precise specification is as follows:
Enchant the Exquisite Amulet with the Fortify Attribute spell, set to SELF,
and 100 points maximum and minimum. You should be able to get 24 seconds
worth of power per use, and with about 12 uses it should be easily enough
to get you from Vivec to the Mudcrab with numerous sets of Ordinator armour.
Don't forget to set the name of the object.
There are a couple of other handy doodads we'll need... personally I'd go for the Jesus Ring as your next creation.
The Jesus Ring
Use the grand soul-gem containing the Golden Saint we killed earlier. An Ascended Sleeper will also work, but I don't think you'll meet those yet as the main quest still hasn't started. You will also need an Exquisite Ring.Make sure you know spells of Water Walking and Feather. Get an Enchanter to enchant the ring, and give it the Constant Effect power of water-walking.
Once that is done, use the remaining magical energy to drive a Feather spell.
I think you can get about 35 points of Feather maximum, which isn't great but
will still come in very handy. You need to use a Saint or Ascended Sleeper
soul to run a Constant Effect charm, and don't forget to set the name, since
such an incredibly useful artifact simply being called 'Ring' would really suck.
The Feather effect is variable since we don't have the power left to specify a minimum value. If it's not working well enough you can 'reboot' the ring by taking it off and putting it back on until you have a better Feather effect.
The Precious
Once you have sufficient money and another high-powered soul, create another Exquisite Ring - this time a constant effect 100% invisibility ring. You will on occasion have to reboot it since you become visible upon doing certain actions or changing map, but it is a constant effect ring, so it's worth the glitches. Call it The Precious. We will need this fairly soon.
Random Act of Deicide
Anyway. Gather loot, free slaves and sleep with Ahnassi until it's about day 310. It is now time to kill Dagoth Ur.Using the Wizard's Staff, head off to Ordrusal and Vemynal. Fly over the Ghostfence and wear The Precious after takeoff so that the cliffracers and so forth don't see you. You must put the ring on afterwards or the takeoff spell will cancel it. You'll need to reboot the ring each time you restart the levitational engines as well.
Once inside, put the ring back on and rush through. Use the One Ring to dispatch any foes you can't avoid (like Vemyn, who has Sunder) and fetch Sunder and Keening.
Once this is done, heal yourself up as best you can and fly on to Dagoth Ur.
Make your way through to the Facility Cavern, blowing the fake Dagoth Ur away with the One Ring. Then rest yourself up to maximum potency - saving in a new slot for good measure - and enter the cavern.
Ready the Wizard's Staff and run past Mr. Ur, hurling yourself off the ledge, using your super-acrobatic powers to steer down onto the drawbridge or, if you can, the heart platform itself. As soon as you touch the floor where the Heart is with your feet, Mr. Ur will teleport down towards you. Dodge His fireballs and either jump past Him, or fly to the walkway around the edge of the room.

Do not lie to Lord Nerevar... he knows... he always knows...
Mr. Ur will follow you, but assuming you reach the position in the screenshot, He will get stuck. Jump straight up a few times and He will soon jump into the lava, leaving you some quality time with the Heart. You may find that two of His friends turn up, but don't worry - what happened to Dagoth Ur can happen to them too.

Splash one god.
Go back to the Heart, and quicksave. Note that we don't have Wraithguard so the following must be done precisely. Wield the Necromancer's Amulet again and make sure you have a few healing rings. Mother's Rings are good, although you can still use so-and-so's ring at a pinch. Get yourself up to full health.
Wield your sword and save. Now, go into the inventory. Replace the sword with Sunder. Very quickly, leave the inventory, smack the Heart twice and go back into the inventory screen, un-wielding Sunder before it can sunder your skull. You will probably take a lot of damage in this - either heal yourself up or wait for the Necromancer's Amulet to do it for you.
Then do the exact same trick with Keening. Wield a normal sword first, quickly substitute it with Keening and then back again before it kills you. Do this about three times and the heart will implode. It's interesting to note that if you try and Action it, the heart will say 'This character is in combat'. I have never been able to talk to the heart, unfortunately. It is possible to poison it with the Toxic Cloud ring, but this has no practical use as it is self-healing.
Once the heart is destroyed, cross the drawbridge, watch it fall and then cast Recall. It is vitally important that you do not meet Azura or she'll proclaim you the Nerevarine which will break things later.

Dagoth Ur was the fifth. The list is long. Dirac Angestun Gesept
Wonders of the World
Now it's time to take a short break. You can chill out with Ahnassi, or kill Ordinators to try and get more than four million gold pieces (I've not yet made it to five) but keep an eye on the date. When the game reaches day 360, it will be time to move on.In the meantime, there are a number of interesting trinkets that you can make.
The Ring of Awesome Jumping
This is relatively cheap. All you need is an Extravagant Ring, a Golden Saint soul and the spells of Slow-fall and Jump. The construction cost is only about 24'000, depending on what mood the enchanter is in at the time and how tired you are (if you're half-asleep, they'll rook you)The ring should have two spells, a Jump spell set to 99-100 on SELF for 2 seconds, and a Slowfall spell, set to 1-1 (always one point) on SELF for 8 seconds.
To use it, activate the ring and do a running jump immediately. The 8-second Slowfall is designed to last for the duration of a normal jump on relatively flat terrain. If you land substantially lower than your takeoff height, you will probably take damage. Feel free to tweak that, but the power level should always be set to 1.
Isildur's Bane
If you can afford yet another ring, you might want to create this one. We don't yet need it for the walkthrough, but it will come in handy later. It's not possible to make a 100% Chameleon Ring of Constant Effect, but you can make one that lasts for about 24 seconds, which is very handy for small thefts. Again, it takes an exquisite ring and about 95000 to get it made, but it's often very useful. I called mine 'Isildur's Bane'.
The Shield of Doom
The first few times I sold stolen armour to the guys in Pelagiad, I noticed that they would tend to wear it. This made me wonder.
You probably don't want to save after doing this, but it's good for a laugh.
Get a Daedric Shield, an Exquisite Ring or some other very high capacity
magical item that can be worn. Talk to an enchanter and using a Saint Soul
or some other powerful source, get them to enchant it with a constant-effect
fire spell, with the target set to 'SELF'. Test it briefly upon yourself,
and then sell it to someone you don't like. Wait for about a minute.
The most interesting thing is that afterwards, everyone knows you did it even though you never laid a finger on them.
The Anniversary
On the 364th day, stop whatever you are doing and return to Balmora immediately.Now that Dagoth Ur is dead, it is time to begin the main quest.
On the morning of 365th day, it will be exactly one year since you were instructed to deliver the package to Caius Cosades. Do so now. He will make no comment on the fact that the letter is so incredibly late, perhaps he didn't notice that the year was wrong, or just thought it was a mistake.
He will send you to Hasphat Antabolis who wants you to get the puzzle-box from a nearby Dwemer ruin that begins with 'A'. You can't pick up the box until he asks for it, which is a pain or we could have sorted most of this out beforehand.
After that comes Sharn-gra-Muzgob, who will talk gibberish if Azura has shown you the completion video, since her key dialogue will have been rewired. If this does happen you're doomed, because she's not the only one.
This time you can get the Skull beforehand. When she's happy, take the notes back to Caius. He'll send you to Vivec, which will be especially fun since the Ordinators are after your blooood.
Carry this through until you are sent to Gnaar Mok to find the secret base. Go immediately to Gnaar Mok - I take a Siltstrider to Vivec, then boat to Hla Oad and on to Gnaar Mok. Find the cave and make your way to Soul's Rattle. Obtain two souls of Ascended Sleepers or Golden Saints - there should be loads of the former and at least one of the latter.
Well they call you the golden avatar...
But nobody really knows you as you are...
When you're just about to reach the core of the base, cast Almsivi Intervention. Out of sheer perversity, visit the Fort in Ald-Ruhn and grab any freebies. Then buy an Exquisite Ring and saunter into the Mage's Guild.
Fyr... I take you to burn
Now it's time to get us a seriously kick-ass set of Daedric armour. The big problem is that the current owner will not want to part with it, and we must not harm him. Still, there is a way - a very obscure way, which I cannot take credit for discovering unfortunately, but I think I'm the first person to put together a full guide of how to do it.

Lizardface in the Ald-Ruhn Mage Guild should be able to teach you the spell of Armour Eater. Buy this, and have the local enchanter construct the 'Disintegrator Ring'.
To make this, enchant the ring with the Disintegrate Armour spell, using 100 points on Target with a 4ft radius, for 2 seconds.
If you created 'Isildur's Bane' as described above, make sure it is on your person because we'll need it soon. Alternatively, if you can't get the Exquisite Ring, a Daedric Shield will work, but you'll have to call it 'Shield Your Eyes' or something. Either way, you'll need a 100% Chameleon device with at least 24 seconds of power. Make sure you also know the 'Calm Humanoid' spell too, because you will need it.
Finally, visit Ahnassi's friend in Vivec Arena and get yourself trained to at least 65 in Sneaksie.
Now it's time to collect the armour. Go to Tel Fyr, making sure you have a nice amount of carrying capacity. I went to Sadith Mora, and then used the Ring of Awesome Jumping to bounce from SM to Tel Fyr in about three hops heading due southwest.
Find Lord Fyr, and blast him with the disintegration ring. When it runs out, flee back through the door and Wait. If you are wearing the Necromancer's Amulet that you took from Trebonius' corpse, you will heal quickly. If not, you may need the Mother's Ring to patch yourself up. The important thing is that you wait long enough for the disintegrator ring to recharge.
Keep doing this over and over again until the pieces of Daedric Armour he's wearing gradually break down and fall off. You might, from time to time, wish to save and then kill him, breaking him open to examine the armour and see roughly how long it has left to cook.
When Lord Fyr is wearing nothing except a pair of boots and a loin cloth, it is time to extract them. Since we will need him alive, it is necessary to pickpocket him to remove the goodies. The snag is that we have beat the shit out of him and broken what is probably a unique set of armour. He is - understandably - highly pissed.
With luck, he will have jumped down the hole during his attempts to slaughter you horribly. That suits us fine. Use the chameleon function (Isildur's Bane or whatever) to make yourself invisible and then cast Calm Humanoid on him to stop him attacking.
This must be done while you're invisible as he'll fly into a rage the second
he sees you.
Creep up behind him and pickpocket him. This is difficult... it's probably
best to save when you're in position and keep reloading until you've extracted
a piece. Then, run in the outer corridor and dump it there before returning
for more.
Once you have everying (forget the boots since they won't fit on your cat feet), Recall to Ahnassi's house. Buy a job lot of hammers from the local DIY store round the corner and repair the armour until you can wear it all. Then go back to Ilunibi and pan Dagoth Gares' head in. Steal his soul for good measure and put it on Ahnassi's mantlepiece later on.

Dagoth Gares was the sixth. The list is long. Dirac Angestun Gesept
You should now have the Divine Disease, so report to Caius and he'll tell you to cure it. Alternatively, don't tell him and just skip that bit, but you'll have to get hold of a Dwemer Coherer - which Caius calls 'very expensive' even though its price is about 60 quid, and Lord Fyr calls 'interesting' even though they're common as muck.
Either way, go to Tel Fyr again. Things will now get very ugly since Lord Fyr is still screaming for your head. What you must do is sneak up on him while still remaining visible.
If he's on the bottom floor, you should go up the hole using the Wizard's Staff and hover over him. Cast 'Calm Humanoid' and then wear The Precious.
Don't use the Chameleon device, it must be invisibility.
Float down and talk to him. This will make you visible again, but you'll be able to give him the Coherer. Go downstairs and get the boots. As soon as the conversation ends he'll try to kill you so flee.

When you have the boots you'll need to do the same again. Calm him from afar and then put the Precious on ASAP so that you can talk to him again and get cured. As before, he'll try to kill you afterwards so run away.
Now you are an immortal feline with a virtually complete set of reconditioned Daedric armour and muscles like nobody's business. The next step is up to you. You can try to complete the main quest - but since Vivec is dead you'd have to create a clone on the command line. If you get fed up of the nightmares and Dreamers accosting you in the street, you can probably just win the game by going back to the Facility Cavern and visiting Azura.
It's especially fun to do that if you're using certain no-cd patches, since the video won't play unless the DVD is in the machine at the time. That means you get to see her wave her arms in the air for no reason and then vanish, while Cat-Dude writes some strange event that didn't take place in his journal.
101 Advanced Abolition Projects
The Khajiit seem to get something of a raw deal in this game, usually ending up stealing to live or as slaves. This irks me. There are many caves, mines and suchlike containing slaves which you can free. This is kid's stuff.We are now going to look at rescuing slaves who can't be freed
To begin with, Councillor Ules owns a farm just across the way from Suran. First, do the quest involving the lizard spy. Put a crossbow bolt through his skull as soon as he goes for Sterdecan and then return to the farm.
We can't free the slaves, and we can't abolish slavery. But we can abolish the slavemasters. Do this, since no-one cares, not even the other slavemasters. When you have ended their lives, go into the manor and execute all within. Small consolation but it's fun, and it's the best we can do for the moment.

Councillor Ules was the seventh. The list is long. Dirac Angestun Gesept
One Ring To Rule Them All
Before we do anything else, the core technique involves persuading the slave to come with you, a technique I invented to free Dro'Zharim from Vos jail.You will need to construct a ring of power. I use an Extravagant ring, set to the following spec: Command Humanoid 15-17 points for 5 seconds on Touch
...I called mine the 'Ring of Command'.
It would also be wise to construct a second device, an Exquisite Amulet to
heal someone as a Target spell.
Enchant it with a Restore Health spell, set to 61-100 points, for 2 seconds with a range of 2 feet on Target. I called mine the 'Health Zap Amulet'.
That should be all we need. While you're at it, have someone fashion a spell of Water-Walking-On-Others. It should work for at least 240 seconds - you may need to bone up on your alteration to make this work.
First of all, we shall rescue Ra'Zhar, who is slave to Mistress Thelena in Tel Branora. Find him and use the Ring of Command on him three times. He should now follow you indefinitely, until you save and reload - apparently this state data isn't being written to the savegame.
Lead him to the hole and jump down. He should follow. It might be a good
idea to use the console to tag him (press '~' and then click on him) and issue
'gethealth' commands periodically to make sure he isn't about to die on you.
If he gets low, give him a blast of the Health Amulet. I would also suggest
you give him a dose of the Disintegration Ring to melt the slave bracer.
Only do this when he is following you otherwise he will take it as an attack
and try to kill you.
One thing about this particular Khajiit is that he is stark naked. This makes him kind of embarrassing to be seen walking around with so you might want to give him some clothes. The only way I know of to do this is to use the console and create some, which is cheating, but basically it's that or nothing.
For a typical DMFA cat-warrior look, try the following:
additem common_pants_03_b 1
additem iron_bracer_left 1
additem iron_bracer_right 1
additem "steel claymore" 1
...the claymore is optional. It will only appear when he's actually fighting, which is not a good thing in Ra'Zhar's case as he only has 10 health points by default.
I led him all the way to Pelagiad and left him in the company of Adanja, a female Khajiit who lives just opposite from Ahnassi. To get there, using the walk-on-water spell. It must be done that way since the fish will kill him if he swims. If that's too much effort, just lead him across Azura's Coast and leave him in one of the farmhouses near Vivec.
To break the bond, either do a save/reload cycle, or take him to the destination and cast an Intervention spell.
The Rescue of Qa'Dar
If you've ever explored the town around Sadrith Mora, you'll probably have come across Qa'Dar, a cheetah dude who is one of Brallion's slaves. You can't buy him, so he is forced to stand there 24x7 in the rain and snow. Isn't that sad? (Hint: The correct answer is 'yes'.) Well, you know what they say... if you love him, set him free.

While 'Dar' means 'thief', 'Qa' is not in the Khajiit lexicon. For all I know it means 'crackhead' or something, but I don't care... we're going to free him and that's that. The main difficulty is getting him out of his cage. I have tried a number of different alternatives. Turning off the collision detection is one way, but that's cheating. Far and away the most reliable method I have found so far is mass-murder.

Don't try this at home
Firstly, we will need to kill all the Telvanni guards to prevent them from interfering with the project. Once the bounty reaches about 2000, find another guard and confess your crimes. Don't let it reach 4k or you'll get the death penalty, which you can only avoid if you're a fairly high-up member of the Thieves' Guild.
Anyway, pay the fine and then kill the others.
There should be about four who need to be killed. Once you're done, go to the
fort and confess your sins once again.
Now return to the marketplace where Qa'Dar is, flip his cage open and save. Remember, the fact that he is in your thrall doesn't get saved, so the entire thing must be done in a single take. You can only save when he's safely outside of the cage.
Now. Open his cage and cast the Command spell on him three times. Then take your sword and use it to cleave Brallion's skull (don't forget to take his ring). This should upset the locals who will begin attacking you, but they will also begin to attack Qa'Dar since he is one of your allies. Leave them to it. If things start to calm down, attack someone.

Use the console to tag Qa'Dar and keep close tabs on his health using the GETHEALTH command. When he starts to dip too low (he defaults to 53) give him a blast of the Health Zap amulet. Eventually, while engaging in combat, he should find the precise angle and velocity needed to spring out of the cage. When this happens, kill everyone except him. Again, take great care that your bounty does not rise too high.

Brallion was the eighth. The list is long. Dirac Angestun Gesept
When he's out of the cage, lead him into 'Muriel's Dirty Corner Club' or whatever it's called. Cast Direct Injection and visit the Fighter's Guild where all your Daedric armour - and anything else which the guards took a fancy to - will be in a chest. Crack it open and get all the stuff back.
Fun with Qa'Dar
What you do with Qa'Dar next is up to you. However, there are a number of very interesting and amusing possibilities.
The Demon Cheetah Coalition
Turning Qa'Dar into a killing machine is one idea. Using the console, select Qa'Dar and give him a full set of Daedric Armour like so:
additem daedric_cuirass 1
additem daedric_greaves 1
additem daedric_paldron_left 1
additem daedric_paldron_right 1
additem daedric_gauntlets_left 1
additem daedric_gauntlets_right 1

additem "daedric claymore" 1
Then buff him up with the following incantations:
sethealth 50000
setstrength 100
setlongblade 100
setspeed 150
setathletics 150

Qa'Dar the Barbarian
Now you have a demon cheetah follower. When you come across someone, punch them. As soon as they attack you, Qa'Dar will spring into action and decapitate them for you.
Feral cheetahs tend to run in packs known as coalitions. You can therefore either obtain (or create using the console) various other recruits and set off to do bad deeds throughout the land.

The Demon Cheetah Coalition
Different skills for different members of your coalition can be helpful, for example, having someone on crossbow proved invaluable when we stormed Fort Moonmoth.

Raid over Moonmoth
Quest to Pelagiad
For some reason I got it into my head to lead Qa'Dar to Pelagiad. We crossed Azura's coast, which was relatively easy once I had invented the Walk-On-Water spell for followers.

Crossing the mountains to Suran was more difficult, but not insurmountable. Climbing down again can be difficult... be sure to keep close to your friend and climb down very slowly. If you go too fast they may panic and you'll spend the next 15 minutes trying to get them to come down again.

Everything went well until I popped in at Ules Manor to recruit Ri'Zaadha. Then things started to get a little inconvenient.
My first inkling that Ri'Zaadha might be gay came when I realised that he was staring at Qa'Dar throughout the entire journey.

Ri'Zaadha can't take his eyes off him
By the time we made it to Pelagiad, the pair of them were casting affectionate glances at each other.

Get a room, you two
The only thing worse was when I headed to the bedroom.

No comment
I want a Follower
Just next to the infamous Dren plantation is a smaller plantation known as the Arvel plantation. Among the unfortunate slaves is a Khajiit called Ma'Dara.The 'Ma' prefix in his name either means 'child', 'immature' or 'apprentice'. So what better thing to do, now that he is free, than make him into your apprentice? Using the technique, turn him into a follower and then use the console to give him the following:
additem steel_cuirass 1
additem steel_greaves 1
additem steel_paldron_left 1
additem steel_paldron_right 1
additem steel_gauntlets_left 1
additem steel_gauntlets_right 1
additem "steel claymore" 1
You might want to boost his strength and health a bit to give him a fighting chance. Sadly he does not seem to be able to level up no matter how many cliff-racers and kwama worms he slays for you.

The Adventures of Sir Ma'Dara


The Caldera Mines
If you do not choose the Redoran path, you may find that you wish to abolish the Caldera Mines, where slaves are forced to excavate raw Ebony and disks containing DRDOS, GEM Desktop and SCO UNIX under appalling conditions. The traditional way to stop this is to free the slaves and slaughter everyone else, but this can land you in big trouble. By far the worst is that when you're arrested the police will confiscate all your Ebony!But there is a way around this. Just as they come up, open your inventory and eat it all. Yes, eat the Ebony. Cram the whole 9000 gold coins worth down his gullet... it'll be the most expensive meal ever. Let's see the cops try to confiscate it now.

Yum yum!
Rabinna Loses It
In the town of Hla Oad, underneath Fatleg's Dropoff, lies the Camora Tong hideout. Amongst these scum is someone selling the slave 'Rabinna' to a contact in Balmora. If you agree to make the delivery, she will follow you around, eventually revealing that she's a drug mule and they're going to open her up to get the drugs back out.This won't do. In fact, justice calls for nothing less than the destruction of everyone within the entire hideout. You could do this yourself of course, but it's much more fun to have Rabinna do it for you.
With her in tow, talk to someone and insult them. Keep doing this until they snap
and assail you (this is a good way to identify Camora Tong sympathisers in general).
Now arrange things so that both you and Rabinna are both near the enemy, but
you are closest.
This means that the enemy will concentrate all their attacks on you, while
Rabinna slowly shreds them to death. Do this for each person. You may need to actually
attack the slaver, but if you do him last, it won't matter since all the witnesses will be
too dead to report the crime.

Rabinna deals justice to the wicked
Let's go do some crimes.
I'll probably extend this section later, but right now, here are a few crimes worth mentioning:
Sloth
Sleeping in someone else's bed is a crime. Don't ask me why. I actually got expelled from the Mage's Guild after a fight near Ald-Ruhn. Just barely winning, I stumbled into the Guild with hopes of getting shelter from the incoming storm. Actually that might have been Destania. Either way, I was mostly dead so I plopped down into the nearest bed and was promptly kicked out of the guild for this most outrageous act.Precisely how they managed to oust the Arch-Mage himself is unclear, but keep it in mind as a warning.
It is actually possible to do this indefinitely. Indeed, with sufficient determination, you can sleep in so many other people's beds that you'll get a death sentence.
Wearing a chameleon ring will work, though - no-one seems to notice the huge, gently-heaving dent in the mattress or the man-sized gap between the covers.
Theft
If you've ever had anything confiscated, it winds up in one of the evidence chests. There is one of these at each major fort. As a rough guide, if you cast Divine Intervention as soon as you realise the stuff is missing you should usually wind up at the fort containing it.With the exception of the evidence chest in Seyda Neen, it is relatively easy to break into the prison, crack open the evidence and reclaim your property. Do not do this while anyone else is around, however, since it is treason and you will be in very, very deep doodoo if you're caught.
It is possible to bait the Seyda Neen guards in this way... by deft manipulation you can break open the lock and very quickly open the chest just as the guard is arresting you. At this point if you pay the fine for breaking the lock, you can grab all the goodies, which will then instantly result in your arrest and their confiscation. If you do it again, you will be for it.

In effect, spotting the theft (inevitable in Seyda Neen) will result in a fine representing the value of all the goods in the chest, in my case something on the order of 200'000 gold coins worth of fine, which will instantly get you a nice little death warrant, in which case you may as well slaughter the town since you have nothing to lose.
Indeed, it was this which taught me that it was possible to get a death sentence. The first time it happened, I slew all the guards in Neen and reloaded. Finding myself in Pelagiad I immediately saw a guard draw his sword and run towards me. Assuming that a fine of 1m gold pieces was such a terrible deed that it had somehow tainted my other savegames, I panicked and fled - fortunately he was actually after the cliff-racer just behind me.
The Adventures of Dagoth Ur
As part of a misguided attempt to see if I could trigger later journal entries using carefully-crafted player names, I created a Khajiit named 'Dagoth Ur'.This gives rise to a number of rather cute conversations:

You're Dagoth Ur... the notorious outlaw!
When the prime objective failed, I decided it would be rather fun to kill the other Dagoth Ur. To facilitate this, and since Ur was basically a throwaway character, I played merry hell with the cheat mode and gave him extravagant powers.

Dagoth Ur has the following modifications implemented:
Strength: 50000
Agility: 50000
Speed: 100
Acrobatics: 100
Athletics: 100
Endurance: 100
Longblade: 50000
Shortblade: 50000
Axe: 50000
Blunt Weapon: 50000
Hand-To-Hand: 1000000
I set his speed and acrobatic powers to something relatively sensible - around 5000, a single leap could jump him off the island entirely, hurling him off the map and making the game cry.
As it stands, he is virtually immortal and can run forever without tiring. I must have jacked up his agility as well, since it seems that no-one is actually able to hit him with any physical weapon.

Dagoth Ur walks past, totally ignoring the soldiers from Caldera who are trying to execute him.
And yes, that is where his purple kilt came from.
Now, one of the interesting things about cranking up his stats like that is
that when he slashes someone's throat with a sword or cleaves their skull
with an axe, they will drop stone dead right away - which is as it should be, all things
considered.
What I did not expect was that the sword or axe will also drop
stone dead. I exaggerate - in reality you'll get maybe a dozen uses before
the object wears out, but they will wear out incredibly fast.
Since Dagoth Ur has a strength of 50000 he is able to carry something like 500 metric tons of equipment, and since you tend to get at least one weapon out of your late foe, I simply picked up everything I could and left the broken weapons in my pockets as well. After all, with the amount of strength at his disposal it doesn't really matter if it's a Daedric katana or half a brick, it will still knock 'em dead every time.

Ur to Ur combat
In the Facility Cavern, Dagoth Ur will taunt you as per normal. Run over to Him, and smack His head in, preferably with a blunt instrument. Since you have done more than a thousand damage points, He will grunt and keel over, still uttering the words "I'm a god! How can you kill a god?" from His dead lips.

Just hitting Him with a big stick seems to work quite well.
He will quickly dissolve into a very small invisible lump, which you can find if you want to pick His pockets. It will be teleported to the drawbridge if you step onto the Heart platform.
Interestingly it is also possible to kill the Heart. In fact it's damn near impossible to avoid doing that with the amount of damage you're doing, which makes it pretty much impossible to win the game, for what it's worth. Sadly it is not possible to steal the soul from either Ur or his Heart.
Dagoth Ur's Atomic Fist
Tiring somewhat of having to replace the weapon every few seconds, I began to experiment with hand-to-hand combat. To my disappointment I was not able to get him to kill people outright, despite the fact that at one million HTH points his fist is doing as much damage as a small nuclear explosion.
My disappointment quickly evapourated when I realised that the first blow
was stunning my opponent - the second blow would indeed kill them outright.
After knocking Lord Ur cold (the evil one, not me) and laughing as his
supine form was teleported to the drawbridge, I hit upon an awesome practical
joke, and went from town to town, punching people I didn't like (basically everyone
who wasn't a Khajiit, Argonian or close friend).
Of course this eventually got me a large enough fine to merit the death penalty, not that I cared since Dagoth had thousands of damage points and was, to all intents and purposes, immortal.
Punching someone with the fist is quite interesting, since they will collapse to the floor and begin breathing very rapidly. This is a universal trait, regardless of whether the entity usually breathes or not - it's actually rather alarming to do this to the mechanical spiders in the Dwemer ruins.
Dagoth Ur meets the Floaty People
You will need a basic install of 1.2.0772 in order to reproduce the effect yourself, although I have now made several videos demonstrating it.
The guy fell over and began to make little bubbling sounds as he started to drown. In an attempt to get out of the water, he stood up and fell over numerous times before something remarkable happened and he began to rise slowly into the air.

Fascinated by this discovery, I ran back into Gnisis to see if I could
find any 'volunteers' to help me reproduce this remarkable effect. This
was dead easy - all I had to do was punch someone and the guards ran
towards me - so I just led them down into the river.
Meanwhile, the first guy was still rising.

My volunteers proved quite helpful and soon I had more people gently rising into the heavens. It seems that the depth of the river is quite important - you must only punch them in the deeper parts of the river.

As far as I can tell this will continue indefinitely unless one of two things happens to interrupt it - firstly, if you shoot the person down with an arrow, they will fall. Similarly, if you walk too far away and leave the cell, the spell will be broken and all of them will plummet back to earth and die messily.

Why they look like this when they fall I do not know.
Sadly I have only been able to repeat this with very high Hand-to-hand levels - a more normal level, say 200 with magical enhancement, does not keep them unconscious for a long enough period of time.
However, it does work just as well in Khuul.

Updates - Alchemy and the Level 70 barrier
Almost as soon as the original version of this walkthrough went out, I was deluged by emails pointing out that I had skipped possibilities offered by Alchemy. Up to now, those possibilities chiefly consisted of being murdered by very angry Alchemists when Cat Dude pocketed their Alchemy set instead of using it, but Andy Centanni's email was enough to convince me that I was missing out on something big.For those of you who don't know, the principle is very simple. Alchemy brews potions, and the power of the potion depends on your intelligence. Since the Fortify spell has, in practical terms, no upper limit, it is simply a matter of getting a shedload of ingredients and brewing a Fortify Intelligence potion, which is made from Ash Yam and Netch Leather. Then you consume that potion, brew another (stronger) potion, consume that and so on. I'd recommend getting at least 100 yams and netch hides, maybe 150 to be on the safe side, and at least 20 portions of Dreugh wax.
In a relatively short space of time you'll have an intelligence of over 10000, and any potions you brew will have a strength of around 2000 and last for weeks of game-time. My primary area of research with potions was to try and replicate the Dagoth Ur experience without cheating. Sadly there seems to be no such thing as a potion of 'Fortify Hand-To-Hand combat', however a shot of Ash Yam and Dreugh Wax with the intelligence level above will fortify your strength to about 2000 points per bottle, a potion which I affectionately refer to as 'UltraBong'.

The level 70 barrier
When your character reaches about level 70 it becomes extremely difficult to level up, since there will come a point where most of your Major and Minor skills are maxed out, and you can't train them any more until your 'problem' attributes develop, but you can't do that until you level up, which you can't do until you can train them.Armourer is a particular problem since they Bethesda guys seem to have forgotten to put the Master Armourer into the game, but the workaround I eventually used was based on Illusion.
The problem I had with illusion was that it depends on his personality, one of the skills I have neglected most. One possibility I haven't tried is having Cat Dude arrested, since jail time depletes his skills, and you might be able to use this to level him back up, but what actually I did involved drugs.
So, while you are brewing the UltraBong, it is also worthwhile making a set of Fortify Personality potions (Kresh Fibre and Green Lichen), say 20-40 depending on how long they last. When I tested this I had an intelligence of only 1000 so they only lasted for about 4 hours.
When you have the potions, go to see the Dunmer chap in Dirty Muriel's Porno Club
or whatever it's called. Take a hit from one of the potions and ask him to train you
in Illusion.
The potion will give you a massive personality, far greater than the usual
limit of 100 and this bugs the game out slightly. If your Illusion was around 80, you
can now train it all the way up to 100, resting to level up and chugging more
potions as necessary. So far so good.
What's interesting is if you already have 100 illusion points. He can't teach you any more, but he thinks he can. The game then clips you to 100 illusion points but it is convinced you've learned something, so your skill rating improves. Do this 10 times and you can level up, even if you had 100 illusion points to begin with. Naughty, but nice.
One important point to note is that while you're under the influence of the drug, everyone you talk to will have their disposition maxed out. Their disposition will drop when the potion wears off, so try and talk to as few people as possible while doing this, otherwise people like dear Ahnassi will suddenly loath you for no obvious reason. This can of course be fixed by handing out a grand or so to the afflicted, but it is something you should bear in mind.
Tribunal
Tribunal didn't really lend itself to an anti-walkthrough. Nor does Bloodmoon, in all honesty, but nonetheless they have a number of items of note.
Raid over Mournhold
During the Almalexia questline, the city will be assailed by weird cyborg-creatures. The Royal Guards and the High Ordinators will scream for you to help them slay the monsters.


You're nicked, me beauty!
The Whole Truth
On my 2020 playthrough, I pointedly ignored King Helseth and took out the Dark Brothers.Tempting as it would be to march into the throne room wearing the armour of a murdered Dark Brotherhood assassin, and going all "Explain why you should not be destroyed." this is not possible, as the King is absent.
Given that the man he's called a hit on has not only wiped out an entire den of assassins but also killed a god, it seems likely that His Majesty is in a panic room somewhere, wondering what to do about the very angry Chosen One.
A particular thorn in Helseth's side is a newspaper called The Common Tongue. Sadly, although you can visit the offices of said underground newspaper, it is not possible to give them the Dark Brotherhood contract. This is a shame, as "KING TRIES TO ASSASSINATE WORLD SAVIOUR" would be the journalistic scoop of the decade.

Regicide
As mentioned, one of the key parts of Tribunal is the monarchy. Among other things, His Majesty commands you to protect his mother from assassins, which offers all kinds of fun like killing her yourself and then reporting failure to the King.The King himself is an obvious target:


Anyway, let's deal with Bloodmoon now.
Bloodmoon
Ingmar the fake Skaal
One of the interesting minor characters of note is Ingmar, who is in the southern region of Solstheim. Allegedly he was a Skaal sent south to slay a barrow-wight as a test of his manhood. There is just one problem with this claim - if you ask him about his Shaman, Korst Wind-Eye, he will deny all knowledge.

The Hunt Begins...
The Wolves are gatheringThe stars are shifting
Come join us in the Hunt
-- Of Carnage and a gathering of the Wolves, Bal Sagoth
When the Blood Moon rises above the Fortress of the Pearl, Hircine will send some doggies to bring you to the game, and then give you a long, boring speech before buggering off again. When he finally lets you go, you'll find yourself in the first ring of the maze with Captain Carius and many werewolves.
Agree to work together, and then run off. While the werewolves are kept happy eating him, find the key. Then use the Ring of Awesome Jumping, which should blast you through the ceiling. Steer yourself down the the centre and hop through the portal, a feat which should be possible without harming any of the wolves.

I assume most people reading this will already have had first-hand experience
with Hircine's ring, but for those who don't, it allows you to enter Dog Mode
on-demand for about nine hours.

The usual rules apply - if anyone sees it (even if they die) you shall be
exposed as a known werewolf and everyone - including the usually oblivious
Ahnassi - will try to kill you on sight forever more.
Why a wolf walking around on two legs is more offensive than a cheetah or tiger
doing the same thing is quite beyond me.

Worth noting though, is that when using the Ring, you don't have to eat anyone.
It's handy if you really hate someone and wish to kill them horribly, or even
if you just like the way he runs on all fours.
Note that when using the Ring of Awesome Jumping, you can't fall directly into the portal chamber in this maze, but you can still get out fairly easily without killing any of the wolves. If memory serves, Tharsten has the key you need to escape, but if you don't fancy trying to find his corpse, you can put the ring on and go through the portal as a wolf yourself.
In the third segment, you'll meet Karstaag. It's easy and probably best, to sleep in the antechamber first, especially if you came through as a wolf, since I recommend you do this as a human... er, cat.
First, smash Karstaag up. That's not hard, especially if you brought TrueFlame or GraveDigger with you from Mournhold. Steal his soul too. It's not very powerful but it does look good on the mantelpiece.

Hircine:  What is it that makes a hunter great?
          Is it his strength?  The speed with which he strikes?
          Or is it his guile?  The ability to outwit his prey?
          Answer me mortal, and decide your fate!

Dog Dude: Mwwrrr?

Hircine:  I said, "What makes a warrior great?  Is it his"...

Dog Dude yawns and scratches

Hircine:  ...

          Sod it.  Let's get this over with, fleabag.
By preference, you should ideally do this in your base form, not as a wolf. In
my experience, the true skill of the hunter is 'being a bastard', something
Hircine hasn't even thought of.Lie, by answering 'Guile' and then promptly using strength instead. Five hits of UltraBong should allow you to pound him into the floor with about three blows.
Alternatively, say 'Strength' and then use the Ring of Awesome Jumping to spring up onto the incense burners by the ceiling and slowly kill him with crossbow bolts. Those of you who read my Arx walkthrough should recognise this approach.
Either way, off Hircine and take his soul too. Like Karstaag, it will fit in a Greater Soul Gem, but having a third of a god's soul on your mantlepiece can't be bad. The only pity is that he was too wimpy to appear in full form so we could destroy him entirely.
Graring
Graring lives outside his house, which is just south of the fork in the river, and roughly due west from Thirsk. You may remember him as one of three people who tell you to get stuffed each time you approach. I originally thought he was the Greedy Man of legend who stole the Winds, but never mind that.

This works for the most part, unless you come in from the Northeast (i.e. Southwest into them) directly behind Covetina's rock. This will prevent her from attacking Graring, and you can in fact talk to her.
That would be boring, though. So come along, casually murder her with TrueFlame and finally run up to Graring himself, waving in his face a huge flaming sword last used for slaying gods. His reaction to this will be "You... you haven't come to kill us?"

As an aside, there are two other things to watch out for. The first of these is someone's leg.
The dead dude's leg may or may not be found in the cave of the Frederick, but wherever it is, it's
worth grabbing for the novelty value as you can hit people with it. Like all
weapons it is prone to wearing out, and also like all weapons, you can fix
it - by hitting it with a hammer.
The other thing is the Frederyk itself - when you kill it, you get made chief of Thirsk. This is a mixed blessing. Yes, people will sing your praises and ask you to rule them, but they also insist in draping dead wolves outside your door instead of giving them a decent, Nordic burial.
The Temple
Having ensured that all of the Temple's gods are dead, the obvious next step is to join the Temple so you can worship... um, something. No matter. The real objective is to take over all the key positions so that you can rule all Vvardenfell forevermore.Doing this very late in the game is kind of fun, since I had already completed numerous quests which I just so happened upon throughout the course of the game. In several quests I was kind of stuck because I had already looted the sacred relics and it took a while to work out whether they were in my private collection or if not, who I had sold them to.
Then there's Elvil Vidron, who claims he's Lord Nerevar. You're ordered to convince him to shut up, or shut him up permanently. Quite why he does this is unclear... he can't possibly be Lord Nerevar, because you are.

Your primary contact is Endryn Llethan in Vivec. He is by and large, a reasonable sort with a few exceptions, such as the Shoes of St. Rilm which he promised would be well-taken care of - and promptly wore them himself.
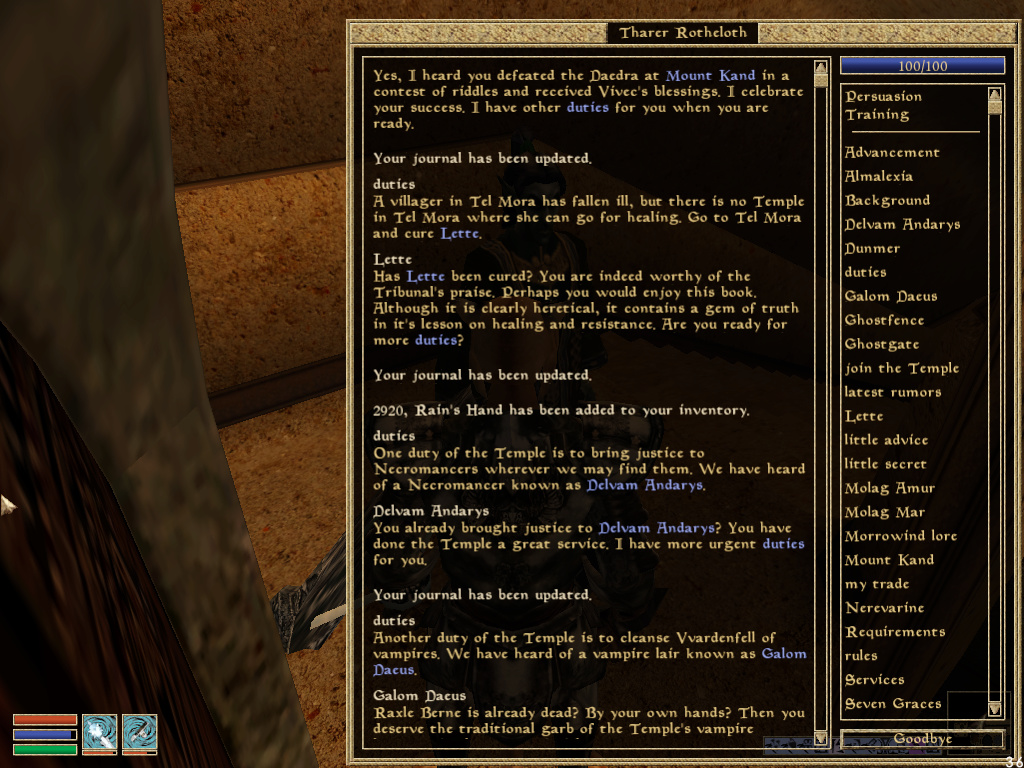
Washout at Molag Mar
Another interesting point of note was Tharer Rotheloth in Molag Amur. The conversation went something like this:
"Well, Cat-Dude, have you completed your pilgrimage to Mount Kand?"

"Hmm?  Pilgrrrimage?  Oh, wait that was last yearrr.  Or the yearrr beforrre?"

"So it was!  Very well.  I have more duties for you.  In Tel Mora there is a
 woman called Lette who has fallen ill.  I would have you go to heal her..."

"Done that."

"Well, how about the necromancer Delvam Andarys?  The vampire Raxle Berne?"

"Both dead."

"I see.  In that case, I have no more duties for you.  Ask at Vivec."

"But I just came from therrre..."
Documentary Evidence can be found here.
Finally, it is worth noting that becoming Archcanon doesn't prevent the Ordinators from attempting to kill you. Now, this may have something to do with the fact that their ancient religion has just been subverted by a an outlander cat who is responsible for at least four deicides, but it is still inexcusable and they will have to be punished.

Archcanon Nerevar
Videos
One of the reasons the oblivion page was rather late is because I've also been making various Oblivion and Morrowind videos. Here are a few:
Suicidal Guard Chase (Nov 2007)
Mighty Fist - outtake (Nov 2007)
Secrets of Morrowind (Nov 2007)
Final Battle of Evil against Evil (May 2008)
Secrets of Morrowind II (Jan 2009)

Cat Dude's photo album
Made with Microsoft Edit, Kate and Midnight Commander!
DMFA (C)1999-2008 Amber M Williams - www.missmab.com